Tuesday, June 21, 2016

Mermaid look

Hello Muggles. :)

I've run out of new products for the time being to show you, so I thought I would show you some looks. I am not amazing at makeup, but I have fun with it.

I call this one my mermaid look!

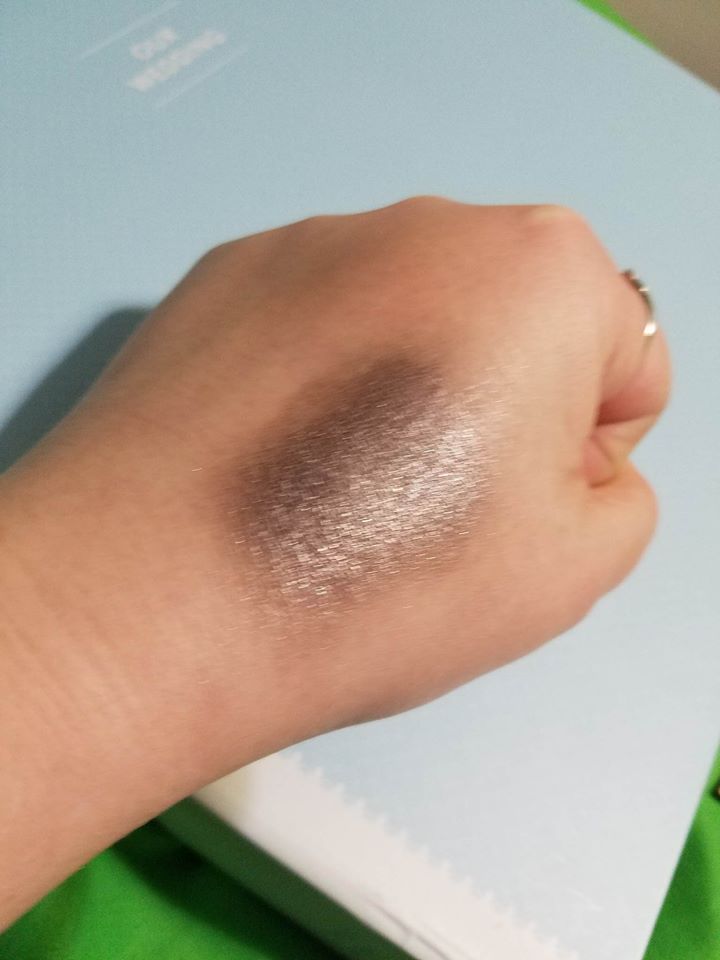
If you look at my bruise blog, this blue pallet is shown there. The brand name is Hip and I am horrible and I forgot to take a picture of what the colors were named. You can see the that purple that I used is called Enchanted Lilac and it's from Avon. 

After applying some primer, I start off with the color on the left of the Hip pallet. It's blueish green and I adore it. Sometimes I just wear this color.

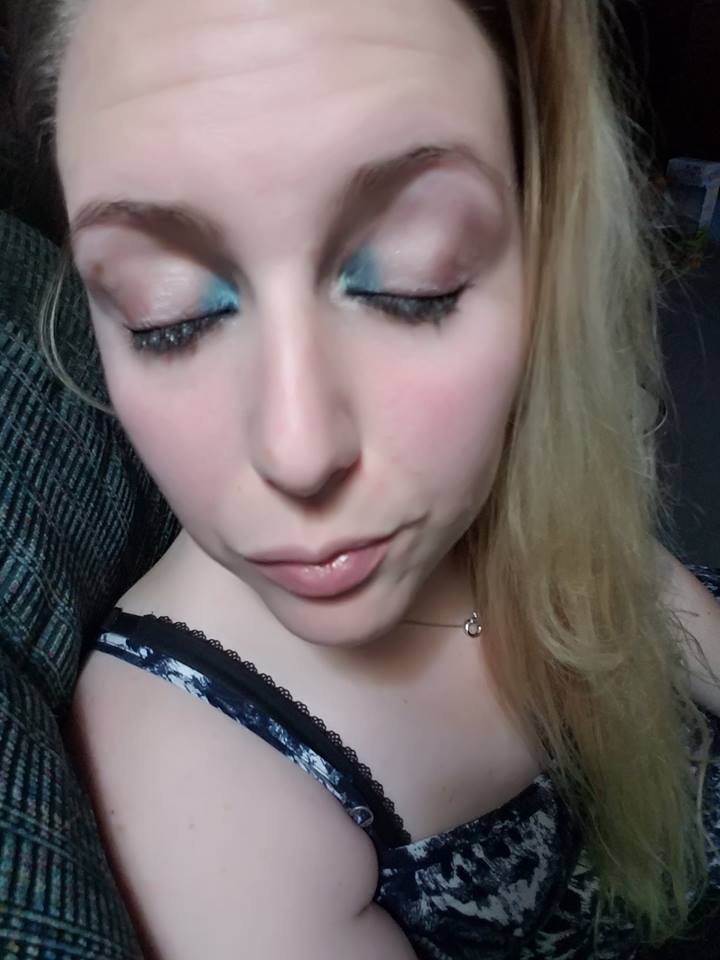
I swear, I don't know what is wrong with me lately; people keep calling it wedding brain, but I accidentally skipped the step where I applied the blue. Basically what you do is near your tear ducts you apply the bluish green, then the deep blue in the middle and then the purple on the outer eye. This picture makes it look really weird and separated and that is because I hadn't blended all the colors yet. Since I forgot to take the second step picture, I wanted you to see where I applied what.

All you have to do to blend is take a longer bristled brush and sweep it across your lid a few times until the defined color lines are gone. 

Here you can see a little better how the colors are blended.


And there you have it... my mermaid look.


Tuesday, June 14, 2016

How to make a bruise

Hello Muggles!!!

I've missed you!!! I am really busy with wedding planning and craziness!! I hope if you knew anyone in florida that everyone is ok. I know that it was horrific thing that happened and I am very relieved that all my Orlando muggles are safe!!! <3 

Anyway.... so when all the Amber Heard stuff was happening with claims that Johnny Depp beat her, I promised that I would show you how easy it was to make a bruise.... and I'm not in hollywood with highly paid makeup artist...heck! I only know what to do because of trial and error! I never even went to cosmetology school!!! ((As I am sureee that you can tell!))

Here is a cheap way to make a believable, yet a touch bit glittery bruise. HAHA!! It would be way more believable if it didn't' have so much glitter, but this is what I had available to me.

Ok so....take this, this, this, and this ((I didn't use the blue and green))

Start off with some primer....

Then add some smokey color


Then add a little of this and this :)


And then just a touchhhh of this....


And Wallahhhhh! I've been beat by a very glitter assailant!!!!

I'm not saying that he is innocent... I am just saying that should could have easily faked it lol!!

Thanks for reading :)


Friday, June 3, 2016

Things that don't work: Volume 1: Tattoo Coverup

Hello Muggles!! :)

Some of us don't work in an environment that allows tattoos. There are many solutions that are out there. There is real tattoo cover up, you can wear sleeves, band aids, etc. If you're a pinterest junkie like I am, you see some great idea that sound awesome in theory and are so great when it comes to execution. 

I found this one blog that said you have eye shadow primer and foundation than you have the ingredients for a tattoo cover. I decided, well this sounds like something logical.


I tried this for you, so you can save yourself the time and effort.

Here are the products I used, both of which I've blogged about previously....

This was right after the primer. I was actually fairly optimistic about this. It immediately got a lot lighter!

I then put two layers of of foundation. Liquid foundation may have worked better for this endeavor, but I don't like it, so I don't own it. I ended up trying one more layer of foundation, but this was as covered as it got. 

...so this was a fail. You could definitely still see my tattoo. Meh.. oh well.

Since my job obviously doesn't care, I took it off. I feel like this is something that could have worked, but in the blog It didn't say how much primer or how much foundation to use. You know those steps that are impossible to follow because they don't tell you enough information on how they got their results. 

Go ahead and give it a whirl if you want, but I'm all set.


Wednesday, June 1, 2016

Kiss Kiss Bang Bang

Hello Muggles!!

The second part of my birthday free sample was a lipstick....and while I love the name, it's a little brighter than what I was expecting. I recently bought some Mac lipstick for my wedding day that looked like it was a similar color and I was a little disappoint that I got something similar for free...but this one was much brighter, so I am still glad that I bought that one.:)

I really liked the cream base. It went on very smooth and stayed all day. So I would definitely recommend it, but possible in a different color.


It doesn't look too too bright, but it was brighter than I was looking for.

Just like the other Marc Jacob's product, it's a tad pricey... but I got it for free!!! :)

Definitely get a Sephora BeatyInsider card!!


Marc Jacobs Gel Crayon Eyeliner

I knew you were trouble when I walked in, but shame on me now...

What up Muggles!! :)

I know that I always bash on spending too much money on makeup, but I always say that sometimes it's worth it... this may be one of those times.

If you're not a BeautyInsider member at Sephora, you should be. It's a free membership, you get points when you spend money there, you get coupons emailed to you and every year you get a present if you go in on your birthday. ((I've mentioned that before in a previous blog.))


As you can see a few blogs ago, I went to sephora with my Makeup Guru. I mentioned that I loved the BeatuyInsider club and I was so sad that I missed coming in on my birthday for my free present, anddd like I hoped she would, my cashier gave me a free present even though I was little over a month late. The workers there are really awesome and really care about their customers and makeup. They'd rather help you find something great than let you leave looking like a clown. ((No, no one paid me to say that.))

Anywayyy back to why I am in trouble and it's shame on me. HAHA! So the free birthday present that I got was a Marc Jacobs sampler!! You read that right! Marc Jacobs!


I was hoping that by a miracle, I would hate the product and that it wouldn't be quality. Psshttt. I should have known better!! It's MARC JACOBS!!!


I was a little skeptical. I don't always have the best luck with crayons.

I've included some picture of me applying the eyeliner. Some people have been asking what applying liner to my waterline means... It's literally what it sounds like. I put eye liner on the lines of my eyes that seal water into your eye. It's not for everyone. Always remember to be very careful. Even though these products are ok to be in your eye, if you eye itself gets too much product in it, over time it could have an affect on your eye.

...yes... there is also a top waterline...

This stuff is amazinggggg!! I really didn't think that it was going to stay well on my waterline at all, but I should have know that Marc Jacobs wouldn't put his name on something that wasn't of the highest quality.

I almost wanted to leave my eyes like this for a less is more look, but to be thorough for all my Muggles I wanted also apply it to my eye lid.

This is the only place that I can complain a little, there is no way to get a nice thin line because of tip.

I almost wiped it off because I didn't want to really wear eyeliner today, but I couldn't see wasting the eyeliner. :)

This product is absolutely amazing! It's so amazing that I wish I never got a sample because now I have tried an amazing product that I can't afford to buy on a regular basis. HAHA!! That's my biggest complaint.